

The Frontis Theme allows you to easily disable or enable the header and footer on a per-page or per-post basis without requiring custom code. This is useful when creating landing pages, full-width sections, or distraction-free layouts.
Follow the steps below to disable or enable the header and footer for specific pages or posts.
Open the Page/Post Editor
- Log in to your WordPress Dashboard.
- Navigate to:
- Pages → Click on the page you want to edit.
- Posts → Click on the post you want to modify.
- Click Edit to open the Gutenberg (Block) Editor.
Access the Frontis Theme Settings
- In the editor, locate the Frontis Icon (⚙️) in the top-right corner of the screen (as shown in the image).
Disable or Enable Header/Footer
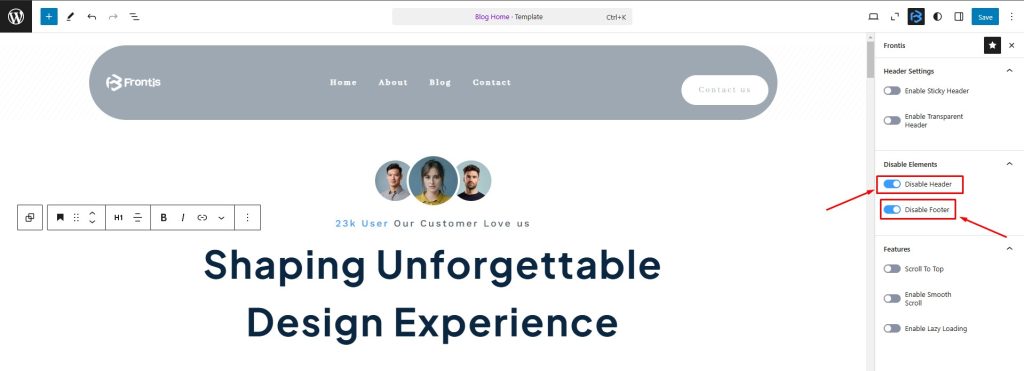
- Scroll to the Disable Elements section.
- You will see the following toggle options:
- Disable Header – Turn this ON to hide the header for this page/post.
- Disable Footer – Turn this ON to remove the footer from this page/post.
Save Changes
- Once you’ve selected your preferences, click Save (for existing pages/posts) or Publish (for new ones).
- Preview the page to confirm the header/footer changes.
Use Cases for Disabling Header/Footer
✔️ Landing Pages – Create a full-screen experience without a header or footer.
✔️ Custom Sales or Opt-in Pages – Keep visitors focused on a call-to-action.
✔️ Maintenance Mode or Coming Soon Pages – Hide unnecessary navigation.
Final Notes
- This method applies to individual pages or posts. If you want to globally remove headers/footers, you need to edit the Site Editor under Appearance → Editor.
- Disabling the header may require adjustments to the page layout for a seamless design.
By following these steps, you can quickly enable or disable the header and footer on specific pages/posts in the Frontis Theme, giving you more design flexibility. 🚀
